Today, if any individual wants to collect a response or share their response, they require some tools that multiple platforms offer today. Using such tools gives them proof that their data will not have to face any problems in the coming days.
The statement can be well justified following Google Forms, which, along with collecting user responses, also provides the capability to sync it on multiple accounts. So, through this write-up, readers will be able to learn the basic details of Google Forms along with the guide to creating Google Forms and sharing and modifying them.
What Is Google Form?
Today, every smartphone holder is familiar with Google. It is a company that has focused on digitization and has launched many such products that are being used for their benefit. Google Form is a product from the popular company Google, which is capable of collecting and modifying user data, syncing it to the cloud, and making it available across multiple user accounts.
Google Form is exactly like a normal form, but individuals can fill it out online, share it online, and import or export their data. Apart from that, the receiver can also modify this form with the user’s permission. Moreover, the many benefits of Google Forms will be discussed below in this article.
Benefits Of Google Forms
- Easy To Use
Using Google Forms is much easier than applying the process of filling your details on a paper. It is straightforward to use Google Forms, and for this, the user needs to download the relevant application and start saving forms on their accounts. A frequent internet connection is required for uploading.
- Accessibility
Different types of inputs and selections are provided on Google Forms, which allows customers to give their answers in Google Forms through different categories such as multiple choice format, short answer format, and long answer format.
- Integration
Google Forms integration is done with every Google app users use today, be it Google Drive, Google Cloud Services, or Google Spreadsheets. Users can sync their forms across all these platforms.
- Collaboration
The biggest feature of Google Forms is that collaboration through this form is very easy; that is, a form can be accessed on multiple devices from the same link, which allows multiple users to share the form’s data with each other’s consent. Moreover, it can be modified and shared, proving an important factor for any company.
- Security
Despite providing many features and collaborative modifications, Google Forms also provides many security provisions. Users can take different steps to secure their form, such as viewing, editing, sharing, and accessing restrictions. Moreover, the links can also be modified.
- Cost-effective
Google Forms is free to use, making it a cost-effective product, and it can be accessed free on any device, which is a huge positive point because these days, forms offer such premium interfaces that are generally assumed to be paid.
Google Forms possesses many benefits, so such a demanding product is important even to the biggest companies. Today, any person who requires a form often gets attracted to Google Forms, but after considering Google Forms, the primary problem that arises here is how to create a Google form. Now, readers can learn how to create and use Google Forms.
How To Create Google Forms?
👉 Step 1 – Accessing The Google Form
- First of all, users from their device’s browser have to open the link: https://docs.google.com/forms
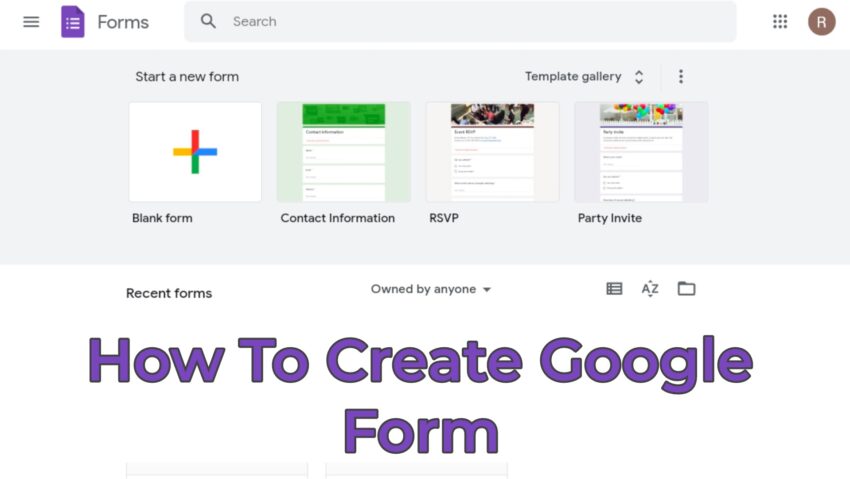
- Now, they will land on the home interface, as shown in the image below

- Users will have multiple template options to create forms, but they should click on a blank form
👉 Step 2 – Editing The Google Form
- The form, by default, would named Untitled Form. You can edit the name and enter the title of your form, and you can even edit the text appearance, such as bolding it, tilting it, integrating a link, etc.
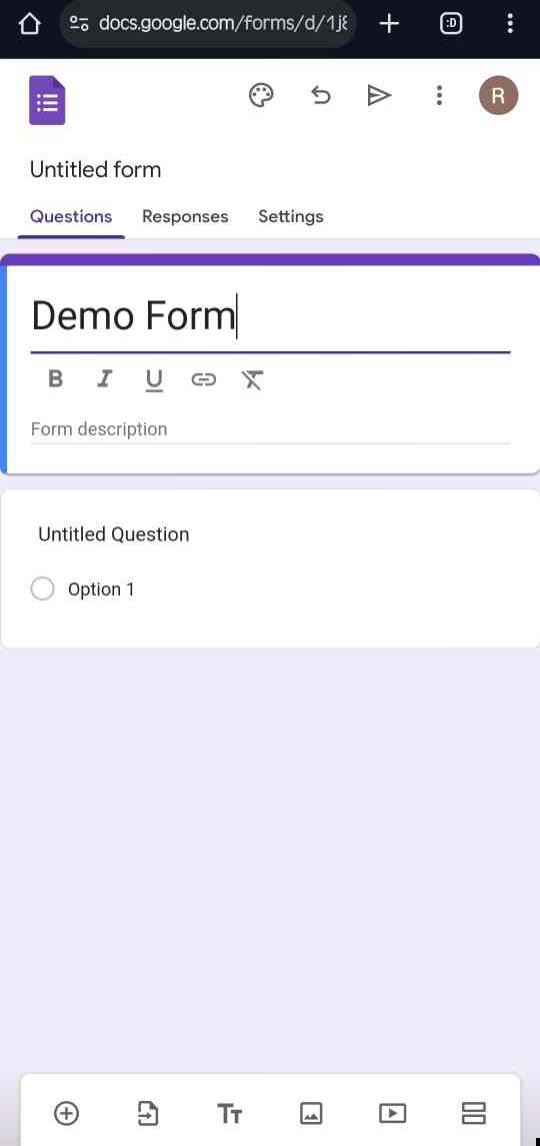
- Now you can enter the form description if required
- Below, an option would be available named Untitled Question; click on it and name your question (you can also upload an image there from the image icon available on the right side)
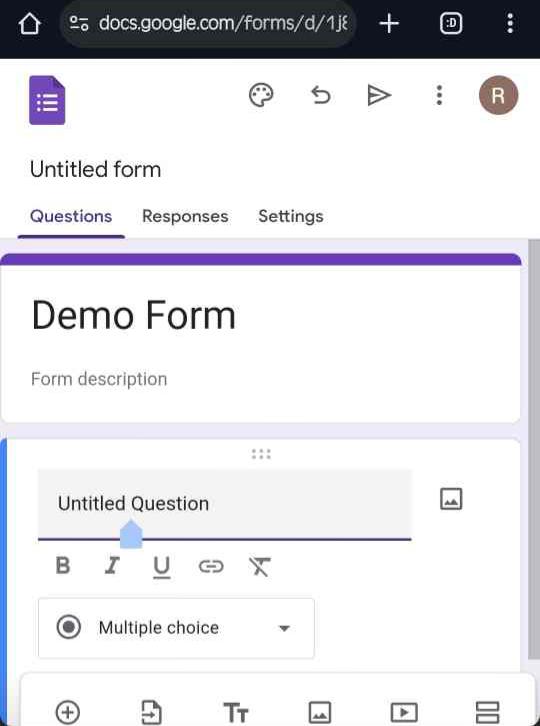
- Now you can change the question format by clicking on the drop-down arrow, as shown in the image below
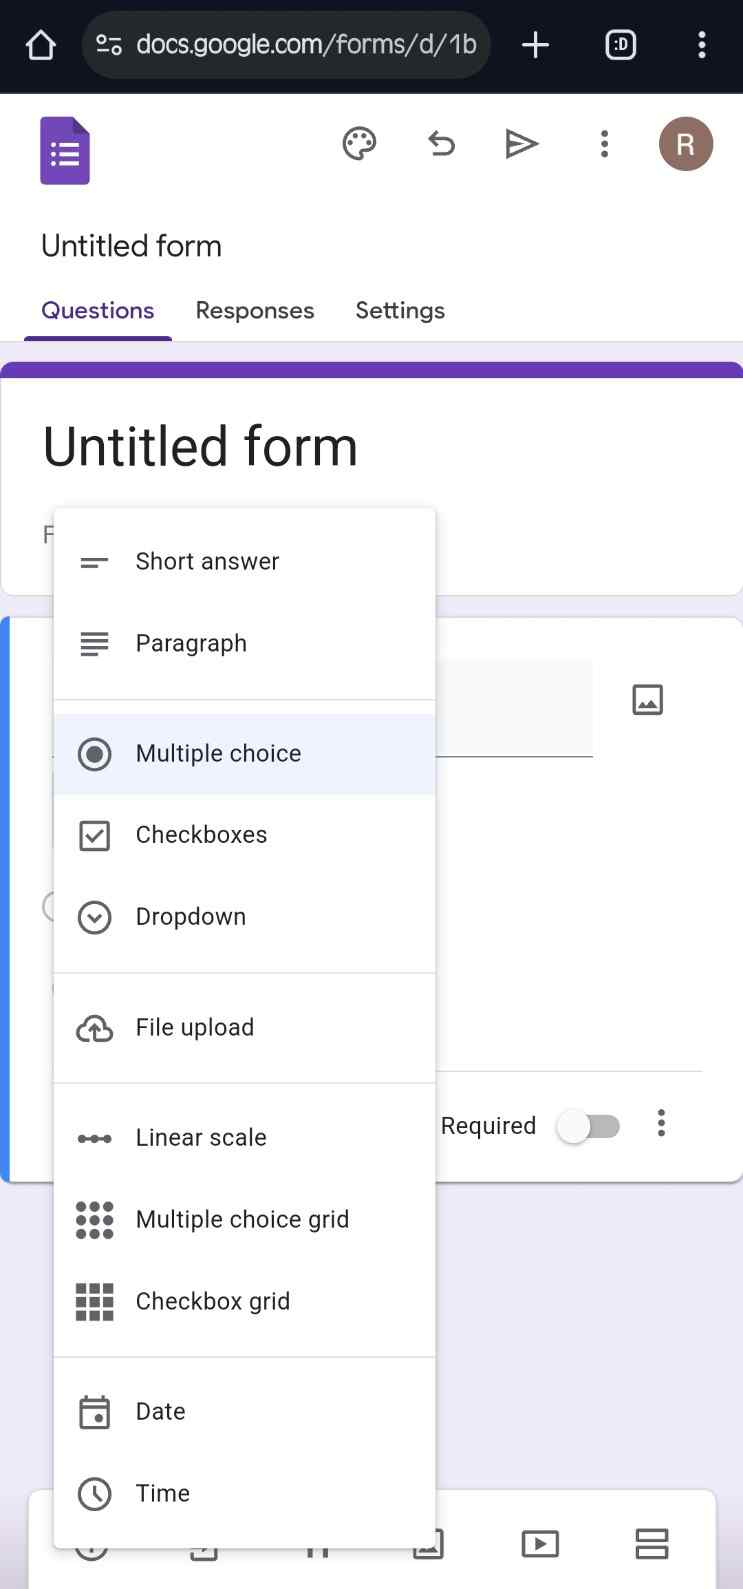
- Now start adding options by clicking on options and reentering the answer choices (you can also add an image to it)
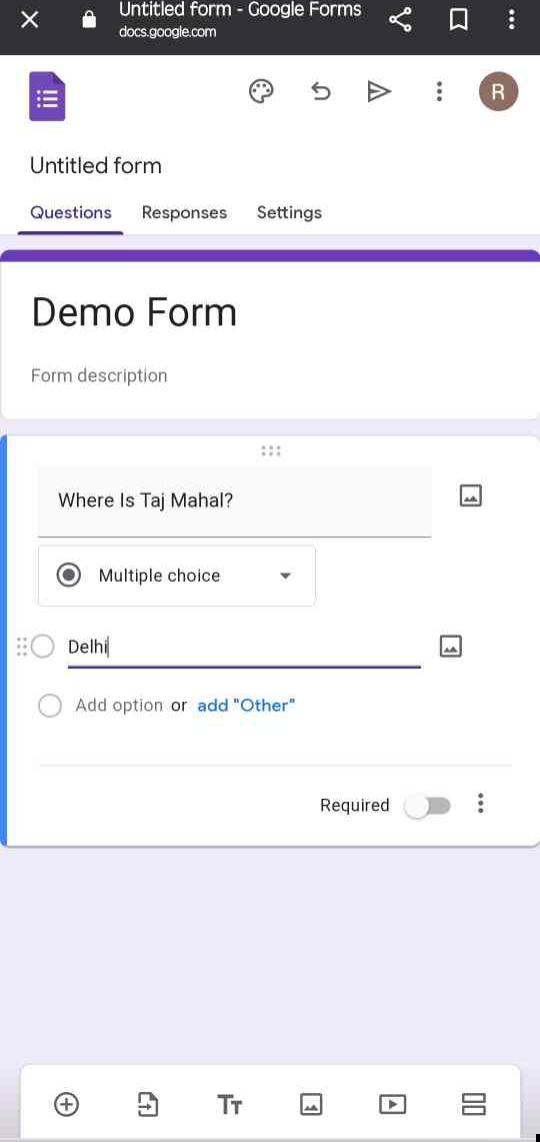
- If it’s a multiple choice question, you can add as many options as you can else; you can leave it blank if you have selected the question format as a paragraph, small paragraph answer, or long paragraph answer
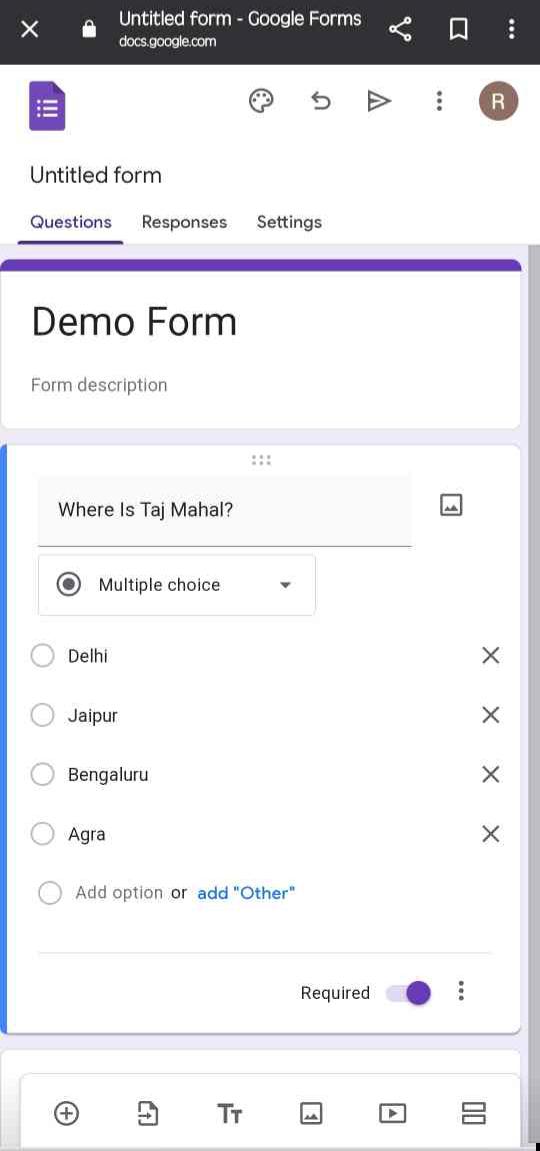
- After entering all the options, you can enable the toggle of required if you want the user to attend that question anyhow else, the form won’t be submitted
👉 Step 3 – Removing The Questions
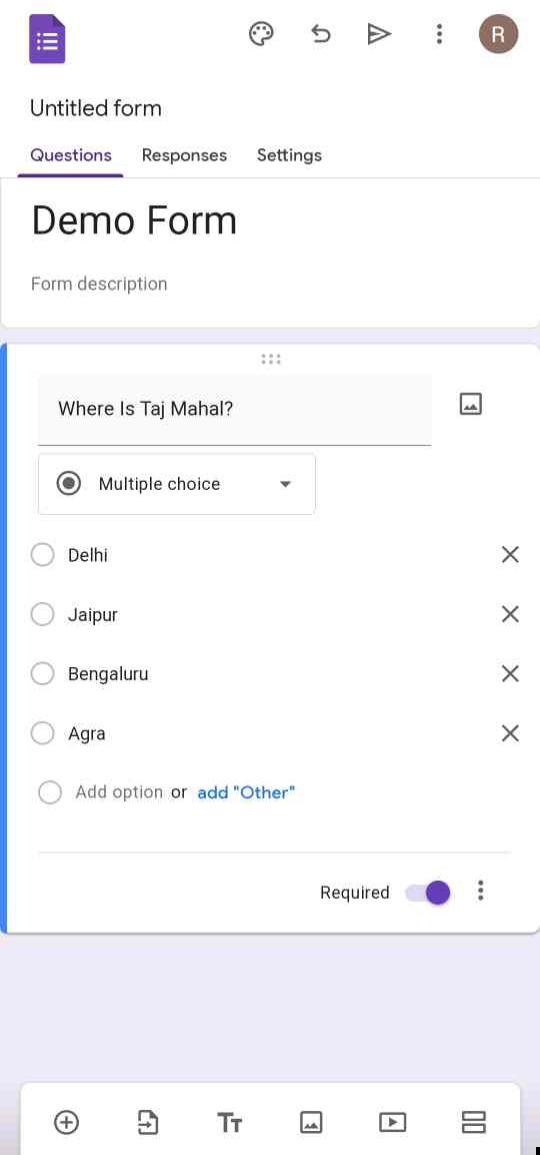
- You can tap on the cut button if you want to remove any option
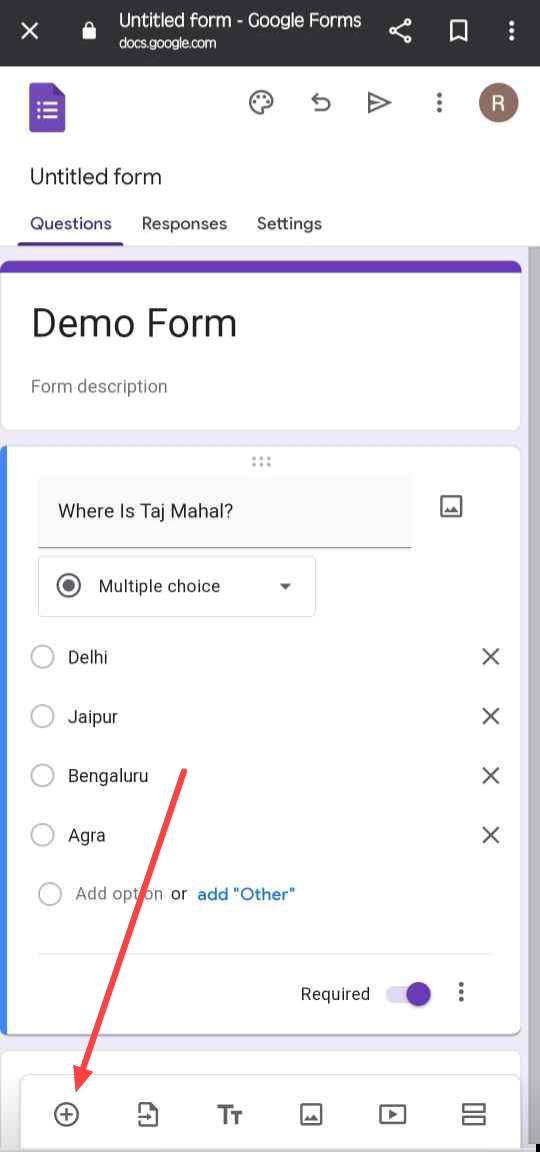
- If you now want to add another question, click on the plus button as shown in the image below and enter your question as well as the option following the steps ahead once more
- If you want to remove a set of questions and options together, you can click on the three-dot
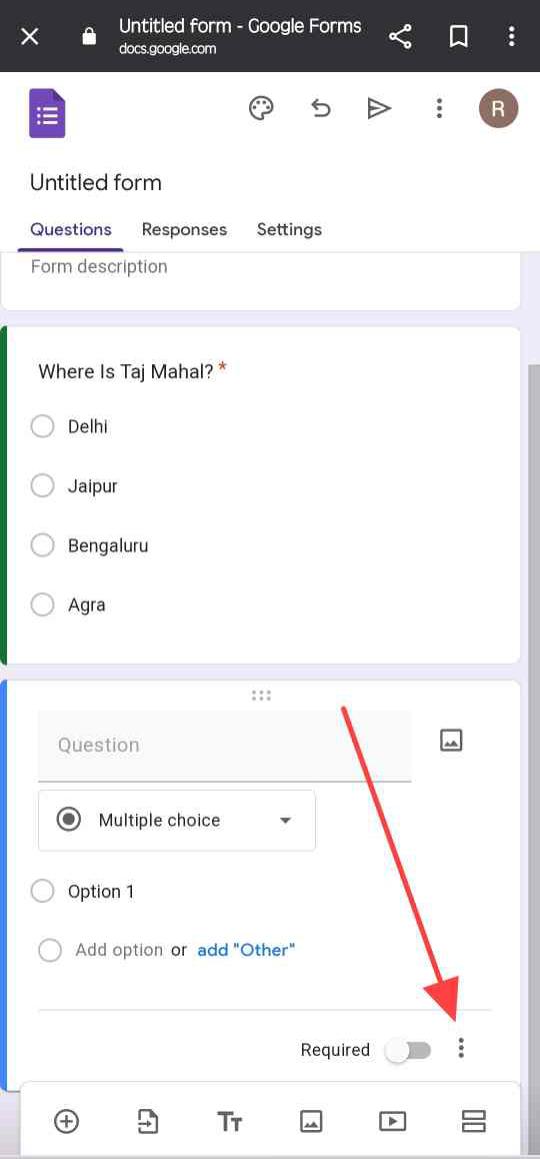
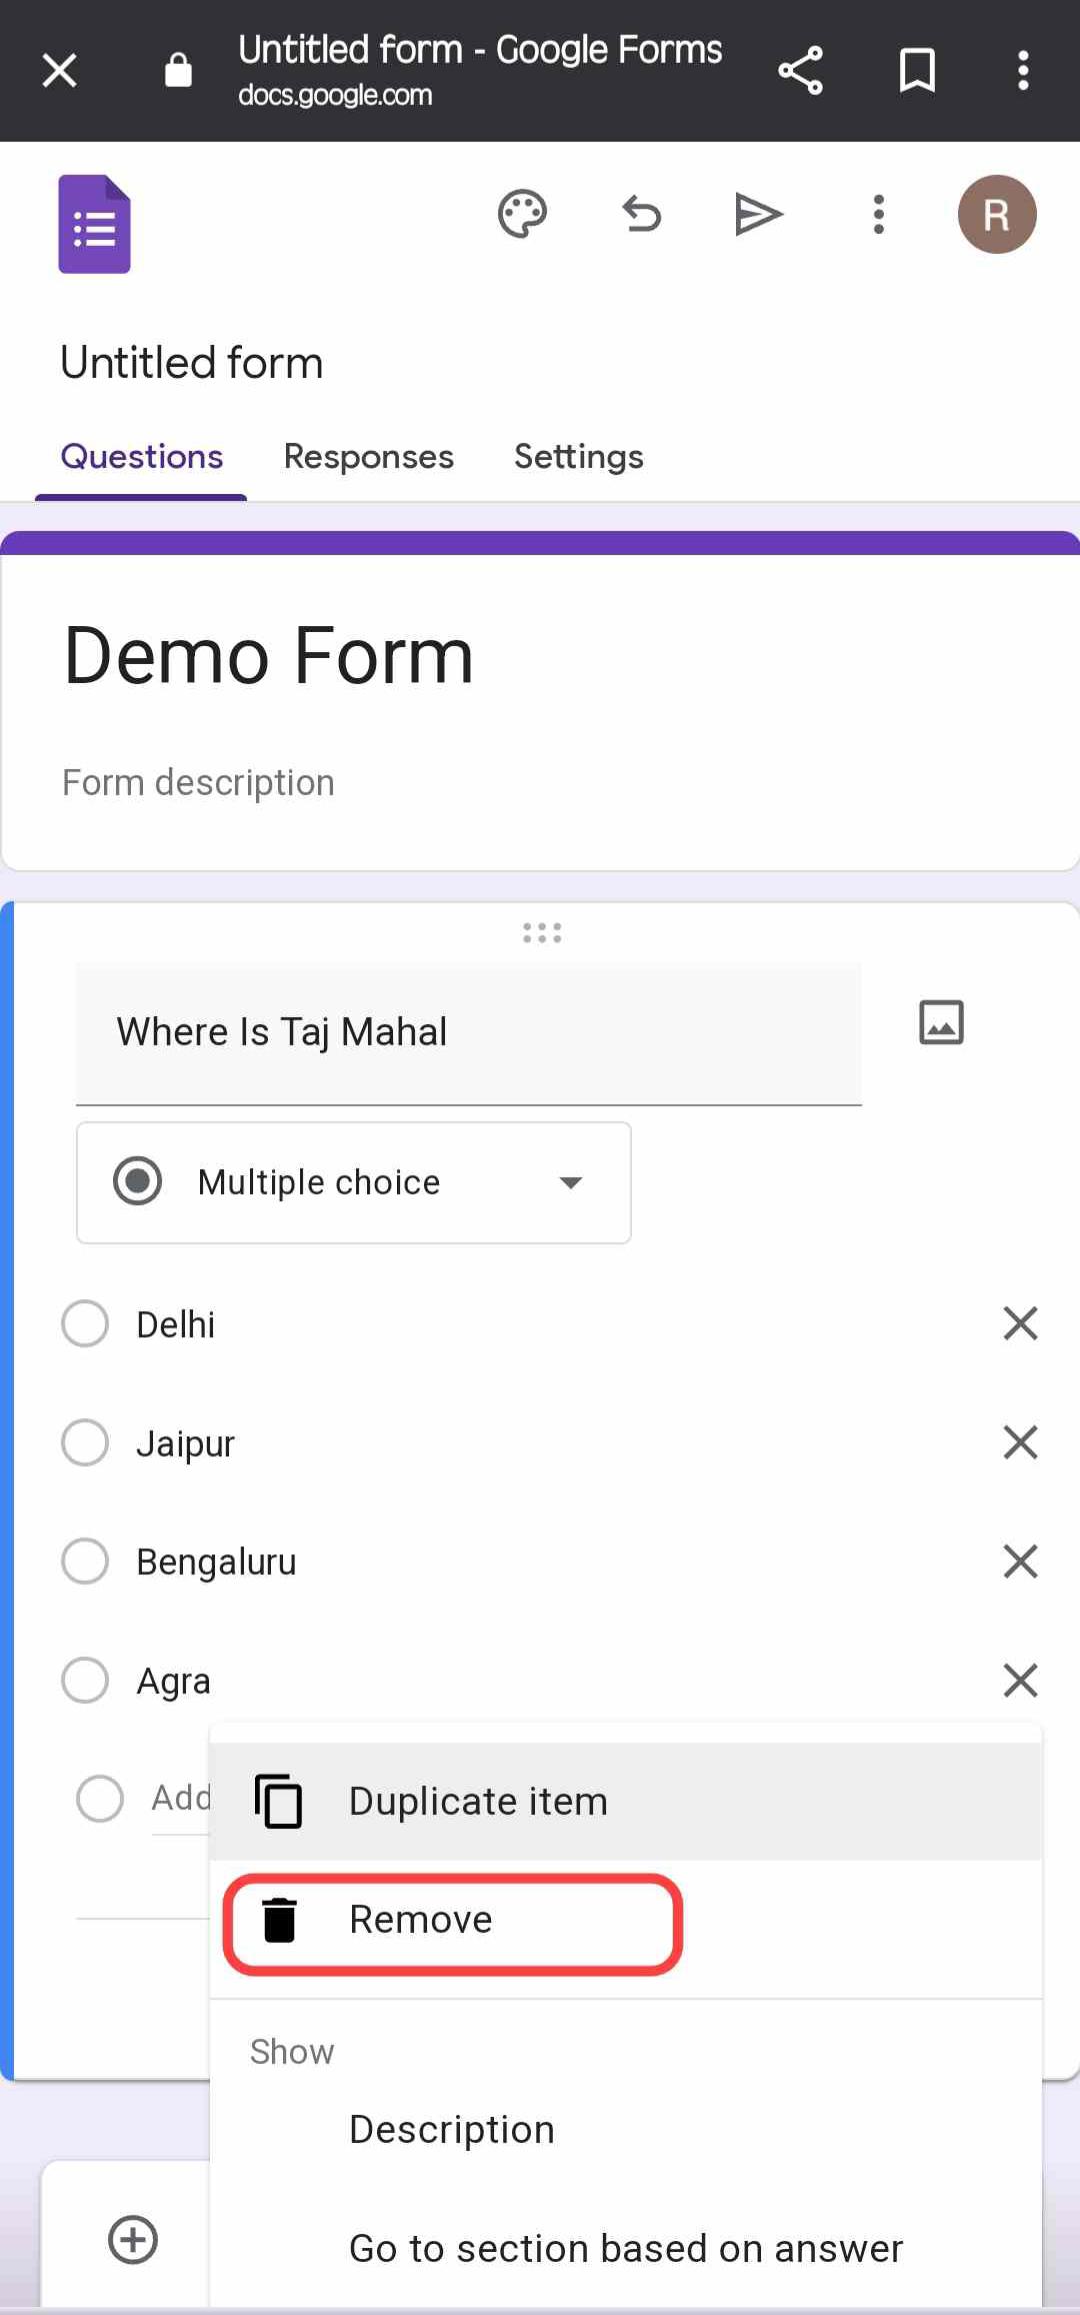
- After clicking on the three dots, tap on remove, and the entire set will be deleted
👉 Step 4 – Sharing The Google Form
- To share the form, you have to click on the three dots as shown in the image below
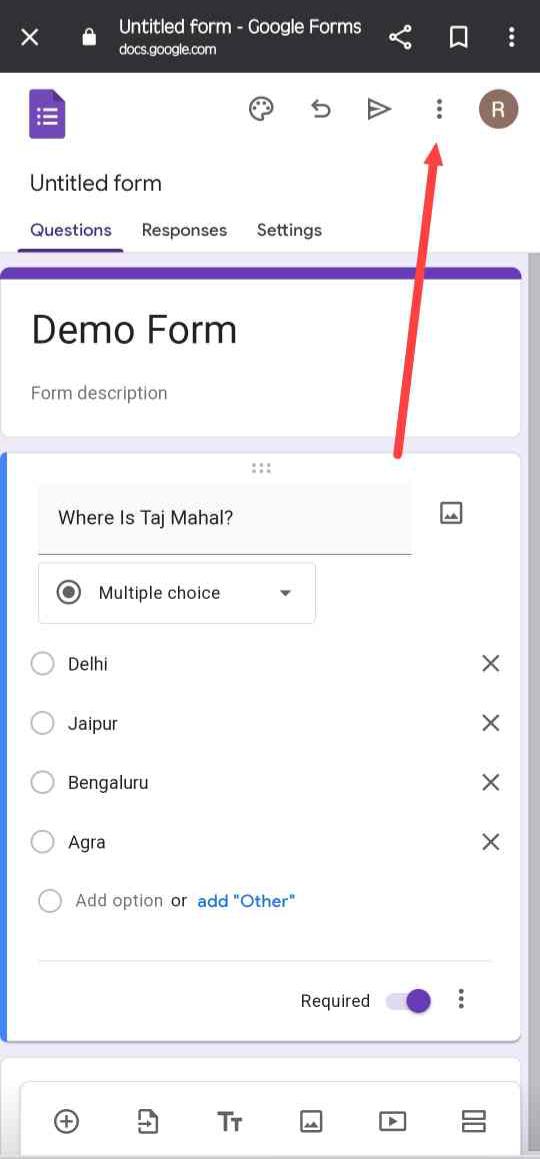
- Now click on Add collaborators
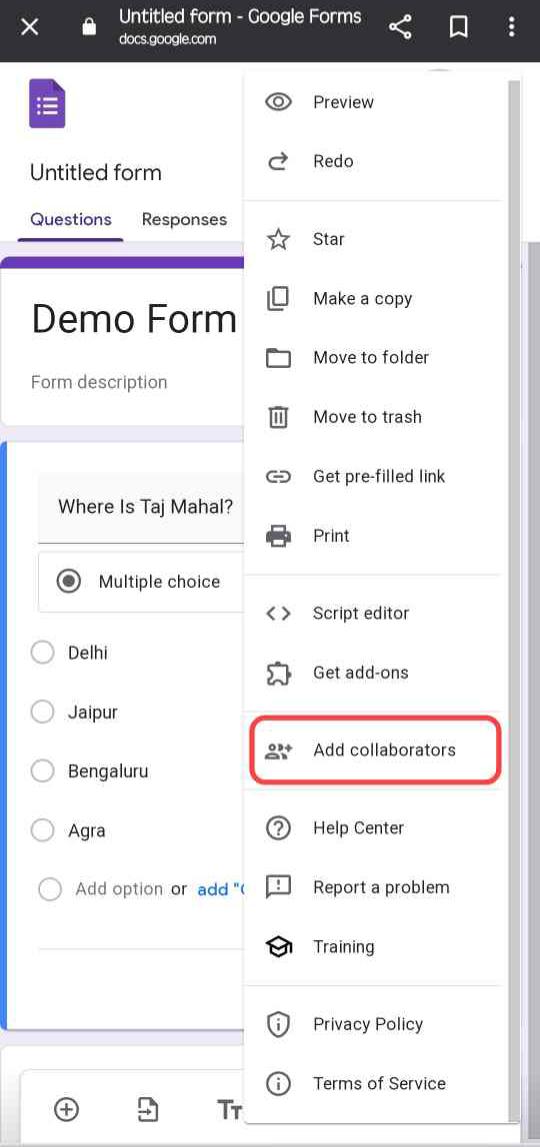
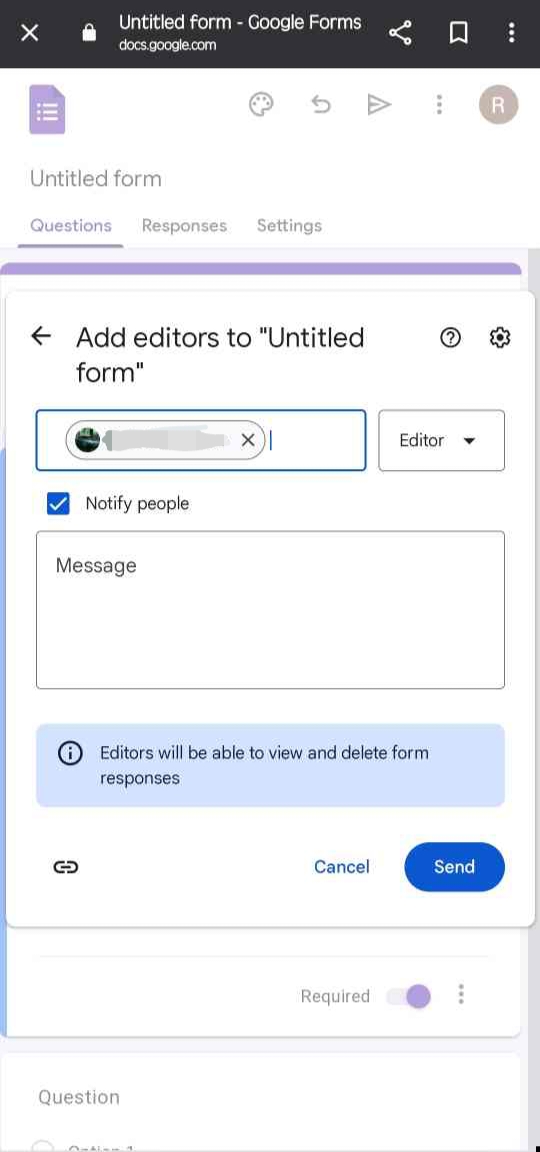
- Now, you can enter the email address where you want to share, drop a message you want to see, tap on send, or apply the steps below to share the form with a link.
- To share the form via a link, click on the restricted drop-down arrow and click on anyone with the link.
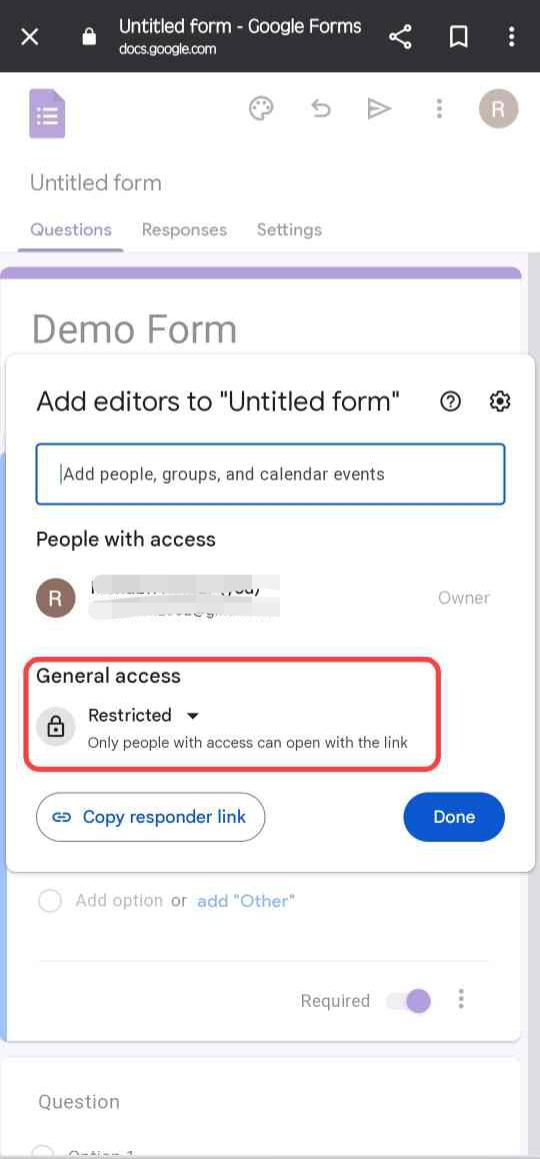
- You have to click on Copy Responder Link and then on Done
- Another method to share this form is to click on the share button, as shown in the image
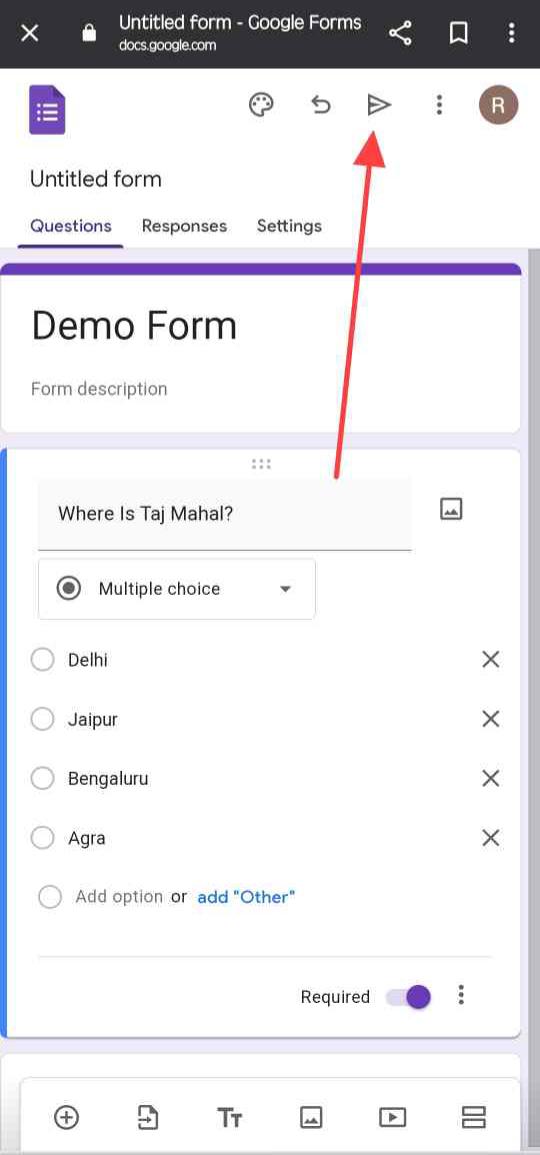
- You can now share this form via email or even through a link

- In this interface, you will have the option to enable the right to collect fillers’ emails or not
Conclusion
Through this write-up, you readers must have come to know about a basic amenity product named Google Form, and by using it, you all can share your information, data, and consent as well as receive it. Google Forms has emerged as a tool that plays a role in many business and administrative fields. All its advantages and disadvantages have been discussed in this write-up, and a complete guide has been shared with you all. All this information will be useful for all of you, so stay connected for such tech-related content.
